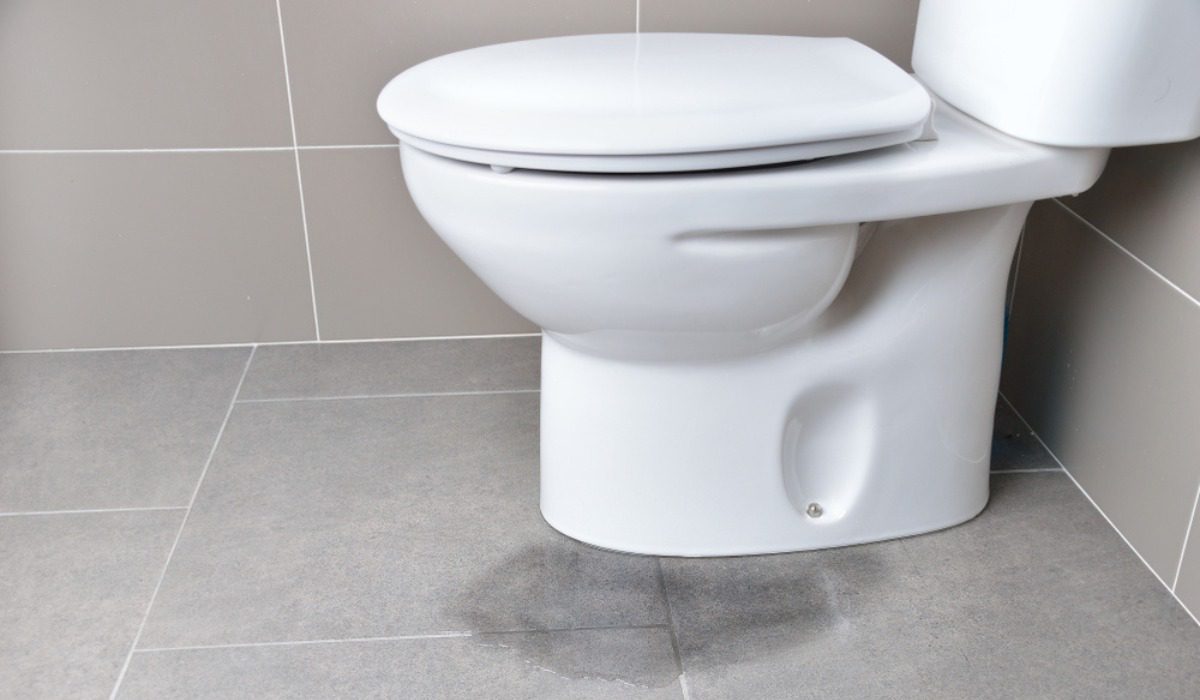
Addressing a toilet leak can be quite a worry, as it not only creates inconvenience but also has the potential to harm your bathroom floor. One prevalent type of toilet leak is when water seeps out from the base of the toilet. If you have encountered this issue in your bathroom, it is crucial to understand both the underlying causes and effective solutions.
In this article, we will provide you with a step-by-step guide for resolving a leaking toilet base, while also shedding light on the common factors contributing to this problem.
See also: How to install a toilet?
Why do toilets leak at the base?
Understanding why toilets sometimes leak at the base can help you address the issue effectively. Here are the common reasons:
Loose tee bolts
Your toilet is anchored to the floor with tee bolts. If these bolts become loose, your toilet might wobble, breaking the seal created by the wax ring. This can result in water seeping out of the base when you flush.
Worn wax ring
A loose toilet or an old, worn-out wax ring can cause leaks. Over time, wax rings lose their pliability, which means they can’t seal properly, allowing water to escape through the base.
Loose water supply line
If your toilet has a loose water supply line, you will notice continuous leakage from the base, not just during flushing. Check the connection where the supply line attaches to the tank to ensure the nut and rubber seal are snug.
Condensation
Bathrooms can get humid and the cold water inside the tank and bowl can cause condensation on the toilet’s porcelain surface. This moisture may eventually drip down, creating a pool of water around the base.
Tools required to stop your toilet from leaking
Here’s a list of essential tools you’ll require to effectively address and resolve a toilet leak originating from the base:
- Rubber gloves: Begin by safeguarding your hands with rubber gloves, as toilet repairs can be messy affairs.
- Bathroom cleaner: Use antibacterial bathroom cleaners to clean the area around the base of your toilet, ensuring proper sanitation.
- Cleaning cloths: Have multiple cleaning cloths, such as terry cloth and microfiber towels, on hand for various cleaning tasks.
- Cordless drill or driver: Some nuts and bolts may be challenging to remove manually. A cordless drill makes it easier to loosen tight bolts.
- Hacksaw: For corroded or stripped bolts, a hacksaw is essential to cut through them effectively.
- Wrench: You will need a wrench, preferably open-ended, to remove nuts and bolts securing the toilet to the floor.
- Screwdriver: Depending on your toilet’s design, a set of screwdrivers may be necessary to disassemble various toilet parts for repair.
- Toilet repair kit: Consider purchasing a toilet repair kit, which provides all the necessary supplies for the job. Alternatively, buy washers, toilet bolts and other parts separately if needed.
- Caulk: Caulking is crucial for resealing the edges of your toilet to the floor, ensuring a watertight seal.
Steps to fix toilet leakage around the base
Follow these detailed steps on how to fix a leaking toilet base to keep your bathroom dry and secure:
Step 1: Check for condensation
Begin by examining the exterior of your toilet bowl to determine if the issue is due to condensation. If condensation is the cause, take these steps:
- Place a tray underneath the toilet to catch excess water.
- Insulate the water tank to prevent temperature differences.
- Ensure the toilet’s flapper is not faulty.
- Opt for shorter and cooler showers, and remember to use the bathroom exhaust fan. If condensation is not the problem, proceed to the next step.
Step 2: Tighten tee bolts
Remove the plastic covers located at the base of your toilet on both sides. Using an adjustable open-end wrench, tighten the tee bolts. This action presses the toilet firmly against the floor, compressing the wax ring for a better seal. If the tee bolts are already secure or cannot be tightened further, move on to step 3.
Step 3: Disconnect and take out the toilet
Turn off the water supply to the toilet by using the shutoff valve, typically located on the left side near the water supply tube and valve tailpiece. Flush the toilet to empty both the tank and bowl, then remove any remaining water using a sponge or cloth. Unscrew the nut that connects the supply tube to the fill valve tailpiece with a screwdriver.
Employ a wrench to remove the nuts securing the tee bolts at the base. In cases where the bolts are corroded and won’t budge, use a hacksaw to carefully cut them. Lift the toilet off the floor drain, and consider enlisting help to move it safely.
Step 4: Replace the wax ring
Carefully use a putty knife to scrape away the old wax seal from around the drain opening, ensuring complete removal. Install a new wax ring with the plastic cone facing downward towards the drain. Verify that the tee bolts align correctly within the key openings on each side of the flange.
Step 5: Reinstall the toilet
Lift the toilet with care and position it back over the drain so that the tee bolts pass through the base holes. Gently press the toilet down onto the wax ring, rocking it slightly to compress the wax and create a secure seal. Using a wrench, tighten the tee bolts and nuts, ensuring they are snug but not overly tightened, as excessive force can lead to porcelain cracks.
Step 6: Reconnect the water line
Reattach the water supply tube to the fill valve and turn the water supply back on. After the toilet tank refills, flush the toilet and carefully inspect for any signs of leaks. Once you are confident that there are no leaks, apply caulk to seal the base of your toilet, providing an additional layer of protection.
Tips for preventing future toiles leaks
Check out these tips to prevent future toilet leaks and safeguard your home from plumbing issues:
Address leaks promptly
Do not procrastinate when you notice a toilet leak. Taking quick action prevents minor issues from turning into costly, chronic leaks. Additionally, timely repairs can help you save on water bills in the long term.
Mind what you flush
Stick to flushing only toilet paper and human waste. Avoid flushing items that can lead to plumbing problems and stubborn clogs, potentially causing more than just a minor toilet base leak.
Avoid harsh chemical cleaners
Steer clear of chemical drain cleaners as a quick fix. These harsh chemicals can harm your toilet’s plumbing and ageing pipes, increasing the risk of leaks.
Regular component check
Fix time every six months to inspect your toilet’s components. This proactive approach ensures all parts are functioning correctly, reducing the chances of unwelcome surprises in the form of unexpected toilet leaks.
FAQs
How can I stop a toilet base leak?
To put an end to a toilet base leak, take care to cautiously tighten the bolts that anchor the toilet to the floor. Utilise a screwdriver or putty knife to remove the plastic caps concealing the bolts, and subsequently employ a wrench to gently secure each bolt.
What causes a toilet to leak from the base?
A toilet leak can result from loose mounting bolts or a worn-out wax gasket. A constant leak may be due to a loose water supply line, a problematic water shutoff valve, or a faulty seal between the toilet tank and its base.
How do I seal the gap under the toilet?
Seal the gap under the toilet by applying a thin and even layer of caulk around the toilet base, covering the gap along the floor and concealing shims. Smooth the caulk with your finger, periodically wiping it clean using a cloth.
Why does my toilet keep leaking?
Persistent toilet leaks are often caused by a deteriorated flush valve (flapper) in the toilet tank. When the flapper fails to seal properly, water continuously leaks into the toilet bowl, sometimes without audible signs.
What is the seal beneath a toilet called?
The seal beneath a toilet is called a wax ring. It acts as a gasket around the toilet's base and attaches to the toilet flange, which is the opening of the waste line.
How long do toilet seals typically last?
Toilet wax rings usually last for 30 years or more, often as long as the toilet itself. While they require no maintenance, they may occasionally dry out, crumble and fail prematurely. Alternatively, wax-free rubber seals can be used and are reusable if in good condition.
Are rubber toilet seals effective?
Yes, rubber toilet seals, especially wax-free ones, are effective. Made of durable rubber, these seals are flexible enough to fit into the flange without needing a wax ring. They can also be reused if they remain in good condition.
What is the typical lifespan of a toilet?
Homeowners typically replace toilets every 10 to 15 years on average. However, with proper care, a toilet can last up to 50 years or more. While toilets may display signs requiring repair or replacement, some may reach the end of their lifespan without significant physical indications.
How serious is a toilet leak?
A toilet leak can lead to damage such as rotted floorboards, ceiling issues below and structural problems. Such damage can be disruptive and expensive to repair, underscoring the importance of addressing toilet leaks promptly.
Can a loose toilet cause a leak?
Yes, a loose toilet can result in a base leak. A loose T-bolt securing the toilet in place can lead to leaking from the base. To resolve this, use a wrench to tighten the bolt, which is the simplest way to fix the issue.
| Got any questions or point of view on our article? We would love to hear from you. Write to our Editor-in-Chief Jhumur Ghosh at jhumur.ghosh1@housing.com |


