Plaster of wall may be found everywhere around us, and there are many different kinds of plastering, each of which requires a unique method of mixing and can be used for a variety of purposes.
Being able to choose the plaster of wall that is best for the project you are working on is, therefore, essential. This comprehensive guide will walk you through the process of plaster of wall step by step, providing you with all the knowledge you need.
See also: About crotalaria juncea
Plastering: What is it?
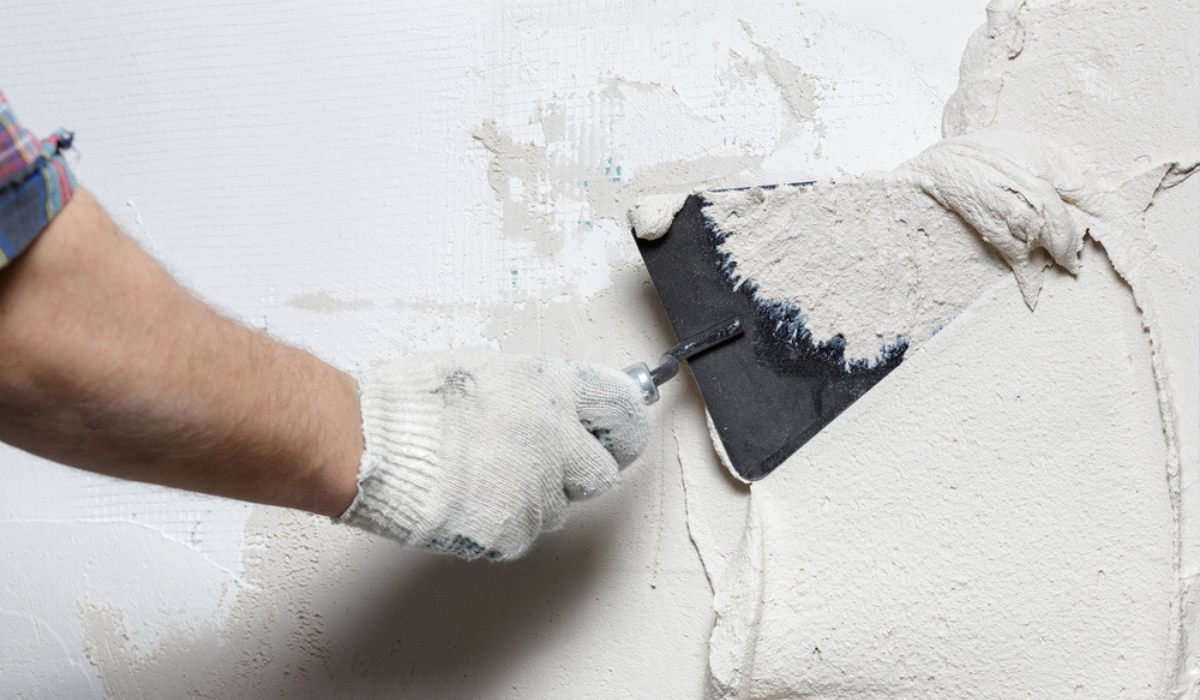
In order to create a smooth, long-lasting surface on walls, pillars, ceilings, and other construction components, a thin layer of mortar is applied to the surface and smoothed out using a plastering process. This is called plaster of wall.
Plaster of wall is done in order to accomplish the following goals and objectives:
- To prevent rainfall and other elements of the atmosphere from penetrating the outside surfaces, which are being protected.
- To provide a smooth surface that is impervious to the accumulation of dirt and dust.
- To provide an impression of the decoration.
- In order to prevent damage caused by pests.
- To hide the use of substandard materials or poor craftsmanship.
Plastering: Different plaster of wall finishes
The following is a list of the wide varieties of plaster of wall finishes available, each of which has a unique look.
Plaster of wall: Smooth cast
Source: Pinterest
Smooth cast finishes may be achieved by using mortar with a cement-to-sand ratio of 1:3. When making mortar for this plaster of wall, fine sand is recommended. A skimming float or wooden float is ideal for laying the mortar. This results in a surface that is both smooth and level.
Plaster of wall: Rough cast

Source: Pinterest
The term “rough cast finish” refers to a kind of surface treatment that is similar to a spatter dash. Coarse aggregate, combined with cement and sand, is what makes up the mortar needed to achieve a rough cast finish. The ratio between them is around 1:1.5:3. The coarse aggregate is between 3 and 12 millimetres in size. A large amount of mortar is scooped up with a trowel and smashed into the surface before being smoothed out with a wooden float. This plaster of wall coating is often used for exterior applications.
Plaster of wall: Sand Faced

Source: Pinterest
Typically, a sand-faced plaster of wall finish requires two layers of plaster. Cement sand mortar with a 1:4 ratio is ideal for the initial coat, and it should be 12 millimetres thick. Zigzag lines are recommended for the first coat. After that, it must cure for a week. Afterwards, a secondary coat is applied, this time with sand and cement in a 1:1 ratio and a thickness of eight millimetres. Sponge it out to make it even. Once you’ve taken some sand and filtered it, you’ll get a uniformly sized grain. Using a skimmer float or hardwood float, the filtered sand is spread on for the second layer. In the end, a sand-faced finish is achieved, characterised by homogeneous sand grain size.
Plaster of wall: Pebbledash

Source: Pinterest
A 12mm thick mortar layer made from 1:3 cement to sand is necessary for a pebble dash finish. Pebbles ranging in size from 10 to 20 millimetres are thrown onto the freshly poured surface. When you’re ready, use a wooden float to push them into the plaster gently. When they’ve set, they provide a nice touch to the building’s aesthetics.
Plaster of wall: Scrapped

Source: Pinterest
Put on a thick final layer, anywhere from 6 millimetres to 12 millimetres, and let it dry for a scraped effect. After waiting a while, scrape the plastered surface to a depth of three mm using a metal blade or plate. Creasing is less of a concern with previously scrapped finishes.
Plaster of wall: Depeter

Source: Pinterest
This is also comparable to a finish with pebble dashes. In this particular instance, though, particles of gravel are employed instead of pebbles.
Plaster of wall: Textured

Source: Pinterest
The application of stucco plastering, in which various textures or forms are formed on the final layer using instruments that are appropriate for the purpose, produces a textured finish.
Plastering: Number of plaster coatings
Single coat
This is reserved for low-quality projects only. It is applied in much the same way as two-coat plaster. The rendering layer, which is used in two-coat plaster, is completed instantly after it has cured.
Two coat
The following operating technique for plater of wall will be utilised:
- Raking the joint down to a level of 20 mm, then washing down the area, and finally giving it a good soaking with water are all steps in the backdrop preparation process.
- Before applying the initial layer of plaster, a base coat may be used to fill up any deep divots on the surface.
- As a first step, a rendering coat is placed, with a thickness of about two-three mm less than the desired final plaster thickness. So that the plaster is always the same thickness, use 15 by 15cm blocks. A plumb is used to align two dots on a vertical line, spaced roughly two metres apart. Several similar vertical screeds are produced at uniform intervals. Finally, cement mortar is placed between each subsequent screed to complete the surface.
- Rendering is done appropriately before it sets to offer a mechanical basis for the protective coating, often known as the finish. During the rendering coat application, mortar is troweled aggressively into cracks and over the surfaces. Rendering coats are kept damp for at least two days, after which they are properly dried.
- There is a wiggle room of one-two mm for the ultimate or finishing coat thickness. Rendering coats are damped uniformly before the final coat is applied. The final layer is spread evenly with hardwood floats and smoothed using steel trowels.
Three coat
When applying three-coat plaster, the process is quite similar to that of two-coat plaster; however, a floating coat is added in the middle. This last layer of plaster is used to provide a smooth finish. Rendering, floating, and finishing coats all stay between nine and ten millimetres (mm), six and nine millimetres (mm), and two and three millimetres (mm), respectively. The texture of the rendered coat is intentionally roughened.
After the first layer has been applied, wait between four and seven days before putting on the floating coat. After about six hours have passed since the application of the floating coat, the final coat may be applied.
Plastering: Considerations to be kept in mind
The following are some of the most important considerations to think about before beginning the task of plaster of wall to ensure that you obtain the results you want.
- Plastering sand has to be crisp, jagged, and clean of dust and other contaminants.
- It is important that the aggregates be rinsed thoroughly such that the clay content of the sand is less than 5%. For the most part, cement or lime will have trouble bonding to sand particles when the clay is present.
- To achieve the required consistency for plaster of wall, it is essential that the aggregates and binder be fully combined. It’s crucial to use the right amount of plaster for the job.
- In order to prevent crazing on plastered surfaces, it is important to keep an eye on the mortar’s moisture content.
- Crazing, which ruins the plastering job, may be avoided by not forcing the plaster to cure rapidly.
- All salts and other contaminants should be taken out of the water and materials before they are utilised. As the soluble salts in the combination crystallise, the plastered surface begins to flake and powder.
- Any protrusions that are more than 13 millimetres from the masonry’s flat surface should be chiselled away to keep the plaster uniformly thin. You should expect fewer plaster mortar applications as a result of this.
- It is recommended to take out the gaps in the brickwork face to a depth of 16–20 mm. Clean the joints thoroughly, removing any stray mortar or dust. Without doing this, the plaster will separate from the backing or between coatings, ruining the finished product.
- A single layer’s thickness should not exceed 15 millimetres.
- When applying plaster, it’s important to dampen the wall first. Lack of appropriate adhesion will occur because the dried back will draw moisture out of the mortar.
- The plaster must cover the whole wall or up to the top of the openings, whichever comes first.
Plastering: Types of plaster
There are many multiple types of plaster. The following categories of plaster are considered to be conventional:
Cement plaster

Source: Pinterest
Plaster made of cement is the kind of plaster that is used the most often in the building sector. Plaster made from cement is made by combining sand, cement, and an appropriate quantity of water. The specifications of the plaster may call for a different ratio of cement to sand than what is traditionally used. However, the most effective ratios are between 1:3 and 1:4, which are often used in practice.
Plaster made of cement is applied to the interior walls, external walls, ceilings, and any other construction components that need it. Plastering only one wall with one layer is generally sufficient to produce the desired surface on interior walls.
Lime plaster of wall

Source: Pinterest
The components of lime plaster of wall are lime, water and sand. The amount of lime to sand that is used is proportional. To further improve the durability of the plaster, it is not uncommon for a trace quantity of cement to be mixed in at various stages of the process. When making lime plaster, fatty lime is used almost exclusively. Blisters will appear on the surface of the plaster if hydraulic lime is used.
Mud plaster of wall

Source: Pinterest
This particular kind of plaster of wall is the least expensive. Clay and sand are combined in the right amounts to make up this substance. It is important that the clay not include any grass, roots, organic materials, stone pebbles, or other such contaminants.
In addition to that, 30 kilograms of shredded straw, grass, or hemp will be added for every cubic metre of soil that will be utilised. Plaster of wall made of mud is most often used in rural areas and impermanent buildings.
Plastering: Special plaster types
In addition to the varieties of plastering materials described above, there are also certain specialised forms of plaster. The following are some of them:
Waterproof plaster of wall
This particular kind of plaster prevents moisture from penetrating the brick wall, as its name implies. As a result, wetness on the wall is either eliminated or significantly reduced. Cement, sand, and crushed alum are combined at a ratio of 1:2, and the resulting mixture is then added to granulated alum at a ratio of approximately 12 kg/m3 of sand. This produces the mortar that is used to make waterproof plaster.
Stucco plaster of wall
Plaster stucco is a form of ornamental plaster that is known for its superior finishing capabilities. Plaster of this sort is typically applied in three coats for a total thickness of around 25 millimetres. Before moving on to the next coat, you must wait for the previous one to finish drying fully. The first layer of stucco plaster is referred to as the scratch coat.
The subsequent layer is referred to as the finer coat or the brown coat, and the last layer is referred to as the white coat or the finishing coat. Stucco plaster may be used for either the inside or outside of a building’s walls.
Gypsum plaster of wall
Plaster of gypsum is a manufactured product that is created in a factory by dehydrating gypsum material in either a partial or total manner. It may be purchased in the form of a white powder and comes in a variety of colours. Powdered gypsum is combined with the right quantity of water to create a readymade slurry that can be spread over walls and ceilings with little effort.
Standard gypsum plaster thickness ranges from 6 mm to 20 mm. The plastered surface may be painted within 72 hours after it has been applied because of how quickly it dries. It is an excellent thermal insulator and has high fire resistance. Another perk is that it doesn’t shrink as it sets, so it won’t crack.
FAQs
What causes the cracking of plaster?
Plaster damage from seasonal expansion and contraction. Whether it's the shifting of the ground, the swelling of your brickwork or the contracting of your roof due to the weather, any of these factors might develop fractures in your building's structure.
What should be taken care of while plastering?
While applying spirit levels, examine the surface for undulations, fractures, and evenness/straightness in the vertical and horizontal planes to ensure a smooth finish. Take the necessary time to let the plaster set. Make sure the plaster is the same thickness throughout.
Does drying plaster need heat?
Plaster may dry up and crack if exposed to too much heat, so it's best to keep the temperature on a low setting as a background heat source rather than cranking it up to high.
What is significant about plastering?
Plastering is a process used to finish building a house by smoothing out any rough spots on the walls. Plastering provides a smooth surface for your home's walls, which is a key factor in the aesthetic value of your dwelling.
Housing News Desk is the news desk of leading online real estate portal, Housing.com. Housing News Desk focuses on a variety of topics such as real estate laws, taxes, current news, property trends, home loans, rentals, décor, green homes, home improvement, etc. The main objective of the news desk, is to cover the real estate sector from the perspective of providing information that is useful to the end-user.
Facebook: https://www.facebook.com/housing.com/
Twitter: https://twitter.com/Housing
Email: [email protected]


